×

Login

forgot your login?

Engine Wiring Harness Upgrade for Universal Diesel Engines

Engine Wiring Harness Upgrade for Universal Diesel Engines

Boats built until 1988 used an ammeter on the engine instrument panel. In 1988 Catalina Yachts replaced the ammeter with a volt meter.

But an electrical issue originally introduced because of the ammeter lingered for several years after the introduction of a voltmeter in the engine panel. 


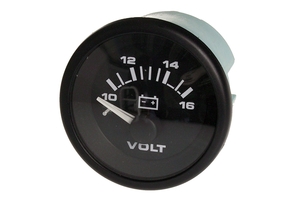
An ammeter is at rest when its needle is centered. It measures current flow and can be either negative or positive. Without an expensive shunt (which Catalina never employed) all of the alternator output has to flow through the ammeter on its way to the batteries

Use of an ammeter dictated a very long electrical path.

Energy from the alternator traveled from the engine on the back of the instrument panel to the engine panel and back before it could charge the batteries

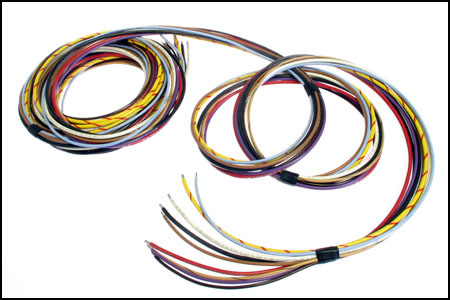
Before Universal Medalist Motors shipped their engine packages to boat builders all over the country, a final test of engine and panel operation was performed. This was accomplished with the engine still on a test bed by connecting an 8 pin plug on the back of the instrument panel to a similar plug directly on the engine. When the engine package was installed by the boat builder, the builder connected the two plugs by adding a suitable length Wiring Extension Harness depending upon their relative placement of engine and panel on that particular boat model.

This wiring scheme was originally created by Universal Medalist Motors who supplied the engine package to Catalina Yachts. The design caused multiple problems for Catalina owners over the years.

By the time power reached the batteries, the total run of the charging circuit was well over 35'. This long run of small #10 wire meant there was a significant voltage drop between the alternator and the batteries. The very small electrical contacts inside the plugs at each end of the Extension Harness create a high resistance, heating the plugs. The energy from the alternator must pass through the plugs four times, twice from the alternator to the engine panel and twice more on the way from the panel to the batteries, with a voltage drop occuring at every pass through a plug. As a result, when power eventually reached the batteries, the voltage was significantly less than the 14.2 volts required for a full battery charge. The batteries never fully charged, resulting in more frequent charging when at anchor.

Due to inadequate charging, batteries were often at less than a full charge when left at the slip resulting in reduced battery life.

A season or two in a marine environment also causes corrosion to the plug connections. An evening and overnight at anchor leaves the batteries significantly discharged. The next morning, when charging, the alternator attempts to push its full capacity through the high resistance connections at the plugs. This heats the plugs significantly and is a potential danger.

This is how it happens

We spent a long weekend aboard a Catalina 34. Anchoring in several SF Bay anchorages. We had a great time. At one anchorage we played cards late into the night. By morning, after having the anchor light on all night, the house batteries were pretty low. The boat was equipped with an engine battery plus two group 27 house batteries.

After coffee and breakfast, we fired up the engine on the start battery. After motoring a bit at cruising speed, I switched to the house bank to top them up. It didn't take long to notice a bit of smoke coming out of the engine compartment. I soon located the source; an eight pin plug that had melted so much it looked like a Dali painting. 

To reduce electrical flow, I switched back to the single engine battery and throttled back the engine. By the time the sails were hoisted, the reduction of energy flowing through the plugs had let them cool enough they quit smoking.

Why the smoke? With the house bank at a low state of charge and while running at cruising speed, the alternator was trying to push nearly its full output through that long, small wire and through the high resistance plugs. If larger batteries or a higher output alternator had been aboard, all of the above problems would have been even worse.

Replacing the ammeter with a volt meter and upgrading the charge circuit improves battery charging

The instruments were later changed to a volt meter

Even then the charging circuit had not been optimized 

When Catalina's panel supplier switched from an ammeter to a volt meter, Universal did not change the wiring harness. The harness still sent the alternator output on its long circuitous voyage to the batteries. It was not until several years later that the wiring was changed and charging improved.

One improvement was the elimination of the push together eight pin electrical plug. It was replaced with a European style buss connector with screw clamps for each circuit. Just eliminating the plugs provides a more positive connection and improves reliability of the engine panel. Our kit #Z2758 includes the bus connectors as well as instructions on re-routing the charging circuit to provide improved charging performance. If your boat still has the eight pin plugs, you need kit Z2758.

An example of a new, color decoded wiring harness 

Consider replacing your original extension harness

After many years, it may have suffered from internal corrosion. If you cut a 20' long piece of insulated copper wire that has lived in a saltwater environment in the middle of it's length, it will have green corrosion in the middle. Our Extension Harnesses are made from pre-tinned copper for longer life in a marine environment. The ends are then dipped in molten solder to provide for a good connection at the euro connectors. Another challenge: after removing the old plugs, your harness may be too short.

There is a simple way to determine in advance of ordering if you will need a new Engine Wiring Harness Extension. Remove the engine instrument panel from its mounting location in the engine panel tray. If you can pull the panel out far enough that the push together plug is outside of the tray (at least 18" of slack), you have enough length to replace the push plugs with the terminal strips. Carefully inspect the Extension Harness for corrosion. If the harness is in good condition, there is adequate slack, and the wire isn't corroded, there is no need to replace the Extension Harness. Remember, if you re-use your old harness, you must tin between 32 and 36 wire ends with solder.

While the panel is out, inspect the condition of the other components. Check the ignition switch, push button switches and any circuit breakers or alarm module for loose connector tabs or corrosion. If the tabs are not solidly connected to the body of the unit, replace the item now before it fails. 

And one more thing… The instructions for the Engine Wiring Harness Upgrade mention using the existing #10 charge circuit wire for a short run from the alternator to the starter for a more direct connection to the batteries. Although fine for the single group 24 house battery that was standard early on, as more or larger house batteries are added it's no longer adequate. Many owners have installed a larger alternator or additional house batteries. Either addition argues for an upgrade to a larger wire than #10 to minimize voltage drop and optimize charging.

Catalina Direct
Tech Support


Visit our tech support library at Help & Advice