Not all of us have had the pleasure of working in an upholstery shop to pick up all of the nuances involved in sewing, assembly and installation methods for all of the cushions and covers on our boats. In production applications, zipper material is bought by the roll and cut to length as needed. As a result the zippers are not like our jacket zippers with pre feeders at the bottom. The follow photos and text walk you through the typical installation of a new cover on your boat.
| 
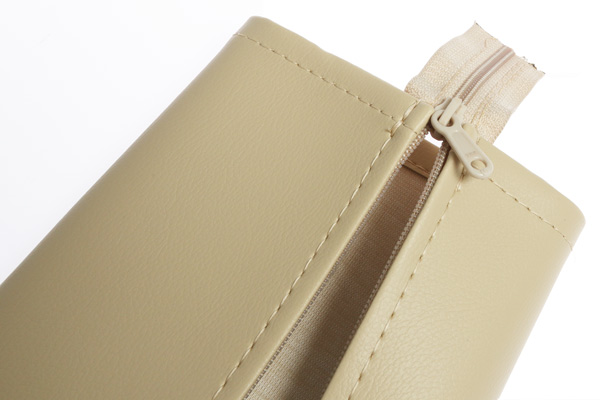
| The Zipper has been hot knifed at the top end so as not to lose the slide in transit. |
The cover shown is for one of the Catalina models that has a deck stepped mast with a smaller diameter compression post inside the main saloon.
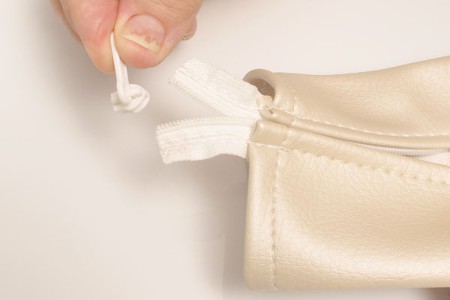
| Trimming off hot knifed portion of zipper tape to remove the slide so it can wrap around the compression post. | 
|
The earlier Catalina 27s and Catalina 30s used teak compression posts built into the bulkheads making these types of covers unnecessary.
| 
| Slide is removed before engaging back onto the zipper tape. |
Some of the smaller boats use stainless steel compression posts that are not covered, but when you get to the larger models, they use aluminum tubes that were covered with canvas to help soften up the interiors.
| Starting the zipper. | 
|
The zipper manufacturer supplies the zipper in 100 yard rolls. Therefore there is no feeder at the beginning of the zipper as you might find on your sweater. Starting the zipper can be a bit tricky but if you hold the two ends firmly aligned with the zipper slide in the other hand, you will be able to start the slide onto the zipper halves.
| 
| Zipper engaged and flap is tucked up inside. |
Interior fabric choices have changed over the years of production and the offerings for the compression post covers varied to match.
| Zipper fully closed. | 
|
Your new cover is now installed and ready for years of service.